Posts

Showing posts from February, 2011

Dell Precision M290 - Lines in Video

Image
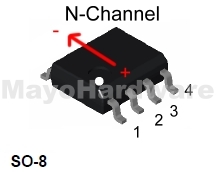
Currently in video preparation for posting solution of the Dell Precision M290 with lines in video. Which will be added this weekend 20 Feb.  This will be a Step-by-Step video. Diagnosis Removal Preparation Repair Cleaning Test Reinstallation The problem is the same for nVidia. Solderballs not making contact. In this case the solderballs are located in the video memory. See other video for similar problem.  This is a screenshot from the video.

Dell XPS No Video (2)

Image
This is unit #2 Dark Blue cover This unit arrives with a request for DC Jack repair. the jack repaired and unit plugged in to test and shuts off immediately.  So I had to inspect inside. Opening the unit to get to the GPU portion to begin diagnosis or repair. Because you have to remove the heatsink before the motherboard, and after removing it what I see is the 'Worst Case' scenario of how a GPU should look.   In an effort to get video working someone put balls of solder under the heatsink to apply pressure on the manufacturers solderballs under the GPU making contact with the motherboard. Along with way too much thermal compound. Though the idea was good in principle material used does more damage. The solder not only contacted/shorted resistors and jumpers on the top of the GPU but removed a number of them (probably inside a ball of solder).  Those extra small resistors and jumper sets, clock speed and memory size information for nVidia.  But the unit was said to ha

Dell XPS No Video

Image
This Dell XPS comes in with 2 others, so after months of none, now three in one day. Various issues and  different problems. Shift-Click to see larger image The first one has a pink shell. Exact model number not copied yet. It has no video but starts like it will go into P.O.S.T. but never does.  The LCD don't not light, or flash briefly (which indicates the inverter works). Removing the keyboard and top I noticed this burnt plastic mark next to one of the connectors for the LCD.   With motherboard removed, the plastic cover was slowly removed and noticed a coil with pads damaged so there was no electrical path completed. Removing the damaged coil and cleaning the area, required me to also remove a few mm of laquer from the mobo.  This exposes copper which will become the 'new' pad completing the circuit. Test and backlight and video appears on LCD. So the problem was an open path by blown coil.  

Tips on Testing MOSFETs

Image
Imagine the flow direction Source to Drain This is how I test FETS  What I will try to do here is to provide a little insight on how to test  MOSFET's in circuit the easiest way I can think of. Essentially the FET acts as a switch, and the GATE either opens or closes the switch. When power is supplied to Pin 4 (usually the GATE) it will either open or close depending on the type of MOSFET it is. The arrows shows the direction for reference when using a meter to test.   Setting the meter in DIODE mode. On the N-Channel FET place the NEG lead on Pin 6/7 and the POS lead on Pin 2/3. You should get a reading of some value ~100 to 500 or higher. Imagine the flow direction Drain to Source On the P-Channel FET place the POS lead on Pin 6/7 and the NEG lead on Pin 2/3. Again you should get a reading of some value ~100 to 500 or higher. The reason I say pins 2/3 and 6/7 is because they are common,

DV5-1124 Motherboard replaces -1125

Image
Insistent Customers and Laptop Repairs -Arrrrg!!! What I had to do to get  a laptop back to the customer before factory heat-sink is replaced. DV5-1124 motherboard without heat-sink This customer was without their laptop for a couple of weeks [from another shop] waiting on the correct motherboard  to arrive. When the new motherboard arrived, it did not come with video memory management unit (mmu) heat-sink. After running a few minutes, the mmu would overheat and the unit would shutdown to protect the chip. An irate customer could not do without for another 3-5 days waiting on the factory heat-sink. So a minor custom heat sink was made to 'hold-off' the customer until it arrived. It consists of a copper pad, plastic sheeting (on underside of pad) with a cut out hole. The copper bridge soldered to the pad was to act as a heat bridge to transfer heat to the original heat-sink.   This is not a recommended repair , only a temporary fix.  There were no guarantees presented

DV6000 Powers On/Powers Off [Intel]

Image
DV6500/DV600 SE series Unit arrived with a common issue among INTEL Dual Core units.  Powers on then shuts off immediately.  Though there can be several causes of this symptom, usually the case is 'cheap'/bargain  ceramic capacitors. When shorted they can also short the AO4914 chip shown in the center of the Zoom-Out picture. In this case the cap marked with the red X is shorted. When removing it split in two horizontally. The two caps on the on the other side has also been known to short previously.  This can also lead to NO Charge, or never reaching 100% charge, or Working on AC but not on battery.  So on the Intel models I check all the ceramic caps in the Power In section first. (well at least after a visual of USB ports and other obvious problems- power plug/charger etc...) Steps Taken: Check Ceramic caps in power in section Locate shorted parts (also checking AO4914 Dual Channel MOSFET) Replace capacitor Test Reassemble Test Again (also with battery in) S

DV 2500/DV2000 SE Will not P.O.S.T./No Power

Image
Click to Enlarge HP DV 2500 14.1" Intel Dual Core - Dead DV2500 model number  and of the DV2000 Special Edition series that exhibits power problems. The indication of power problems were shown by the ring-light on the DC Jack. Since the LED uses the +5v line this points to a problem in the low power section of the unit. There were no other symptoms other than not powering on, or rapidly shutting down. Sections also controlled by the +5v  Power ON Button  LED's and panels  DC Jack Power indicator (ring light) After close examination, found that the USB port was shorted.  This was a clear visual short. PIN 1 is +5v for the USB which is Vcc or 5v for powering device that is plugged into port.  With a dead short the power controller (usually a MAXIM IC) will not allow the rest of the unit to turn on. Though making troubleshooting a little more challenging, it protects the motherboard from additional damage as well as other parts. Steps taken: Remove damaged